Tencent Meeting (or VooV Meeting ) local recording helps you record meetings quickly and conveniently. It can save the meeting video and shared content in your local folder.

How to record a meeting on VOOV?
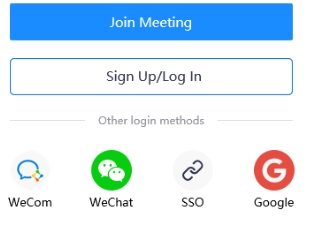
1. Open Voov meeting and log in with your account and password
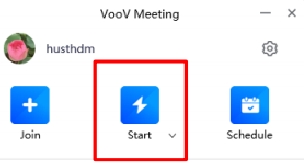
2. Click Start.
3. Click PC audio and Click Start video
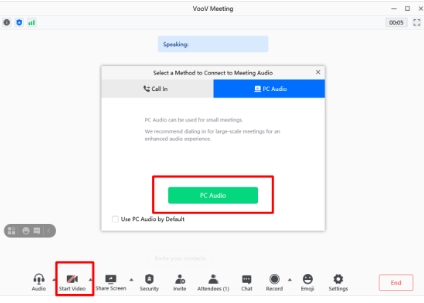
4. Make sure the speaker and the camera are open

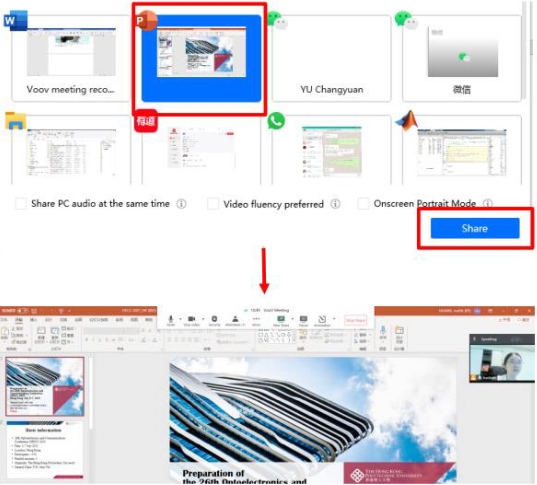
5. Click Share Screen and choose the PPT and Click Share
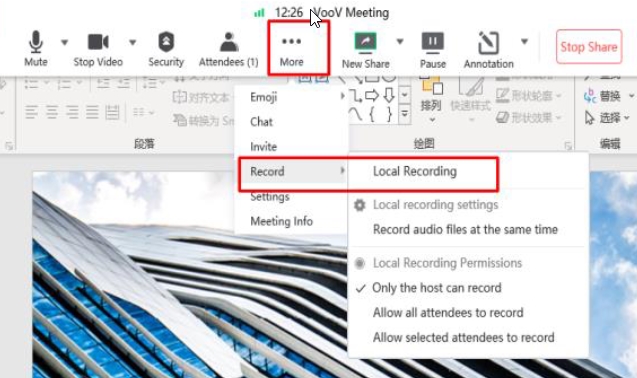
6. Click More -> choose recording -> Local recording
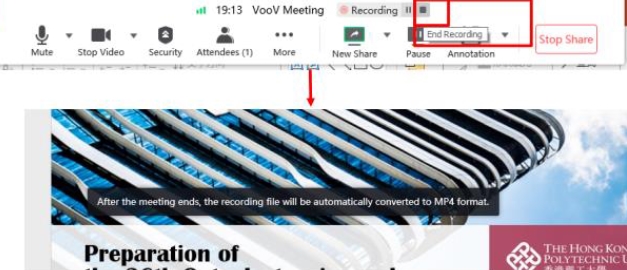
7. It starts recording highlighted in the red box. Then you can start presenting your PPT

8. When you have completed your talk, Click End Recording
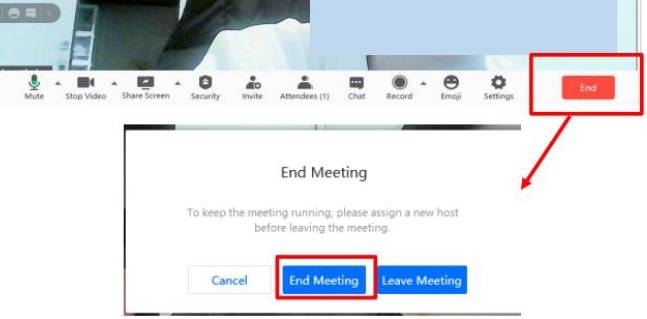
9. Click End -> End Meeting
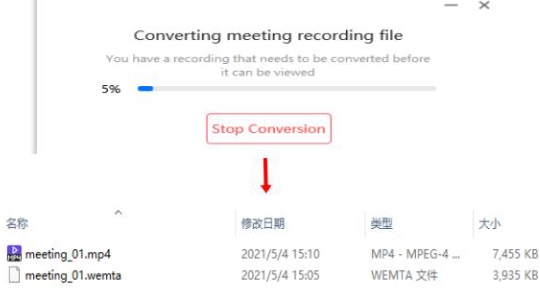
10. After the completion of the converting process, you will get the recorded video
11. Check the quality of the video and Rename it as the format: Presentation code+ author-name
Recording permission
- The VooV Meeting app does not support local recording but can control the recording permission.
- If the permission is Allow selected attendees to record, Allow Recording/Forbid Recording are displayed in Attendees > More.
- If the permission is changed from Allow all attendees to record to Allow selected attendees to record, all attendees can still keep their recording permission, the Attendees > More > Forbid Recording option will be displayed for the host to disable recording for a specified attendee, and new attendees after the change cannot record the meeting.
- When the recording permission is Allow selected attendees to record, if you revoke the co-host role from an attendee, the Allow Recording permission will be kept by default. When the recording permission is changed from Allow selected attendees to record to Only the host can record, the attendees allowed to record will become unable to record.
- Before recording the meeting, you can click Record to check whether you have the recording permission, and if not, apply to the host for it promptly.
Enabling Local Recording
Windows/macOS
- Click Recording and select Local Recording during a meeting.
- If you are muted, you can select Unmute or Record without audio when starting recording.
- If you are not muted, the recording will be started normally.
- After the recording is started:
- Record at the toolbar will become *End.
- The recording status will be displayed in the top-left corner of the main window, and the Pause Recording and End Recording buttons will be displayed.
- Pause Recording and End Recording options will be added to the menu expanded after you click the arrow button on the right of End on the toolbar.
- Pause Recording: you can click this button to pause the current recording, and the button will become Resume Recording.
- Resume Recording: you can click it to resume recording.
- End Recording: you can click it to end and exit recording, and After the meeting ends, the recording file will be automatically converted to MP4 format will be prompted.
- The recording status will be displayed in the attendee list.
- After a meeting ends, the system will automatically convert the recording file and then open its folder, so that you can quickly view the recording file.
Local Recording Permissions (For Hosts/Co-hosts)
Windows/macOS
During a meeting, click the arrow icon on the right of Record at the toolbar, and three recording permissions will be displayed: Only the host can record, Allow all attendees to record, and Allow selected attendees to record.
- Only the host can record: this is the default option. If it is selected, only the hosts/co-hosts can enable recording.
- Allow all attendees to record: all attendees can enable recording.
- Allow selected attendees to record: after it is enabled, the hosts/co-hosts can enable recording and allow specified attendees to enable recording in Attendees.
- Forbid Recording: when Allow selected attendees to record is selected, the hosts/co-hosts can select an attendee allowed to enable recording in Attendees and click Forbid Recording to revoke the recording permission.
Android/iOS
During a meeting, tap More > Settings, and find Recording Settings, three recording permissions will be displayed: Only the host can record, Allow all attendees to record, and Allow selected attendees to record.
- Only the host can record: this is the default option. If it is selected, only the hosts/co-hosts can enable recording.
- Allow all attendees to record: all attendees can enable recording.
- Allow selected attendees to record: after it is enabled, the hosts/co-hosts can enable recording and allow specified attendees to enable recording in Attendees.
- Forbid Recording: when Allow selected attendees to record is selected, the hosts/co-hosts can select an attendee allowed to enable recording in Attendees and click Forbid Recording to revoke the recording permission.